Add/Edit a Customer Extension
1. As an Account Administrator, click on the "Features" tab and select "Notification Customer Extensions".
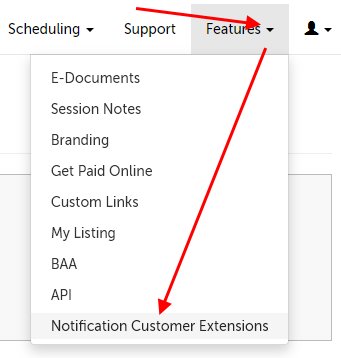
2. Available Customer Extensions will be displayed along with a description of its function. Click the "Edit" button to add/edit text to an extension.
Remove a Customer Extension
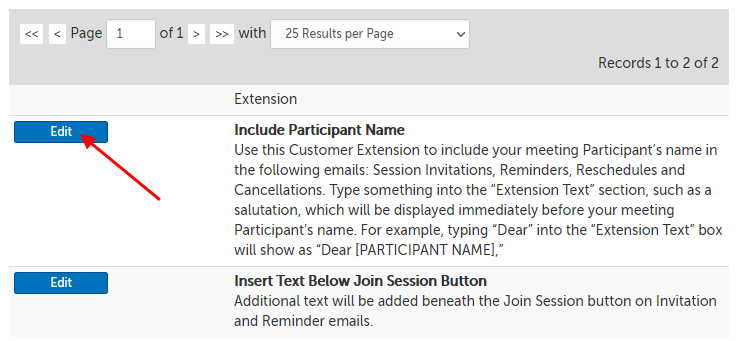
1. As an Account Administrator, click on the "Features" tab and select "Notification Customer Extensions".

2. Available Customer Extensions will be displayed along with a description of its function, and the current text used for that extension (if applicable). Click the "Clear" button to remove an extension from use. This will immediately delete the extension. (If there is not a "Clear" button, then that extension is already not in use.)
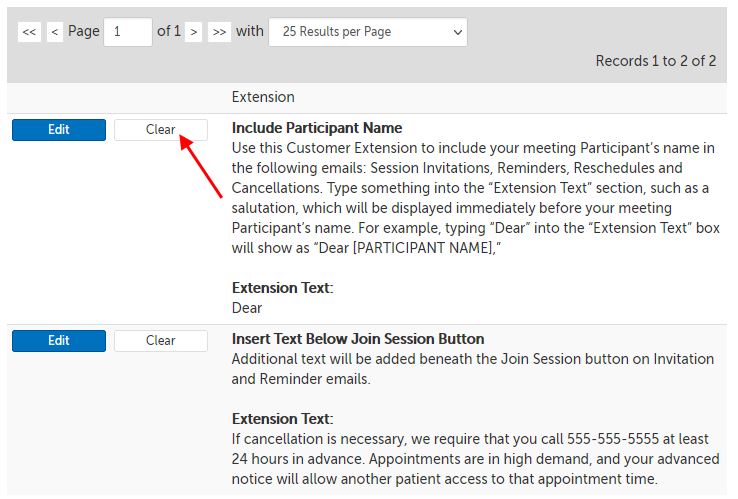
Current list of Customer Extensions
Include Participant Name
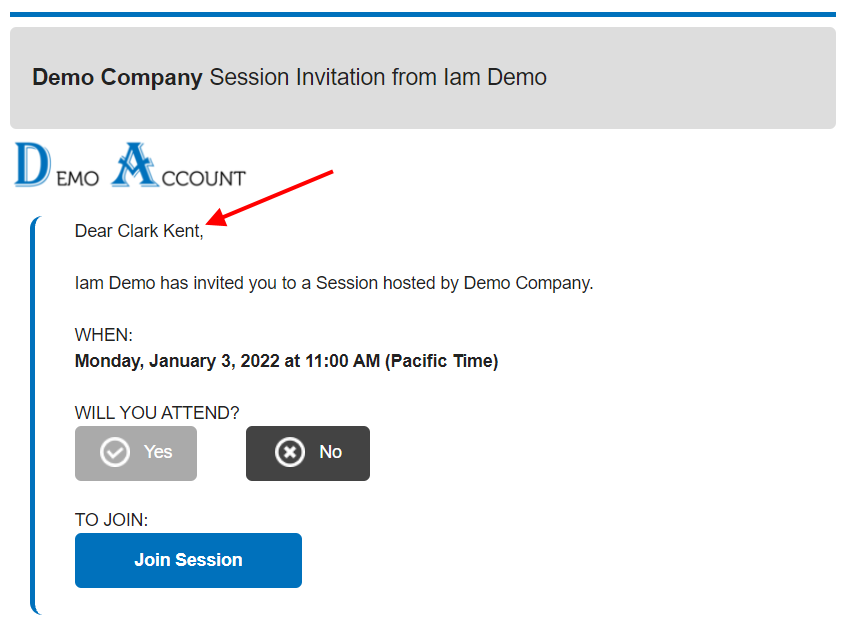
Use this Customer Extension to include your meeting Participant’s name in the following emails: Session Invitations, Reminders, Reschedules and Cancellations. Type something into the “Extension Text” section, such as a salutation, which will be displayed immediately before your meeting Participant’s name. For example, typing “Dear” into the “Extension Text” box will show as “Dear [PARTICIPANT NAME],”
This extension does not apply to SMS notifications.
1. Refer to the section
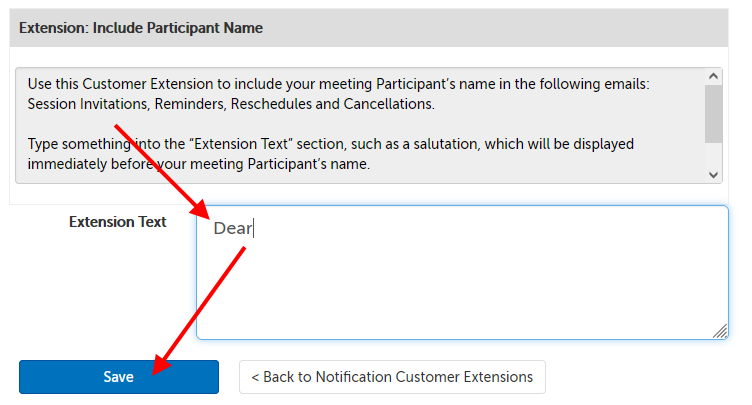
2. For this example, "Dear" was used. Type "Dear" into the text box and then click "Save".
3. Participant names normally are not included in email invitations, but now the name (as displayed on your dashboard) will be used in the invite, reminder, reschduling, and cancellation notifications. For example, if your participant's name was "Clark Kent", it would look like this:
Insert Text Below Join Session Button
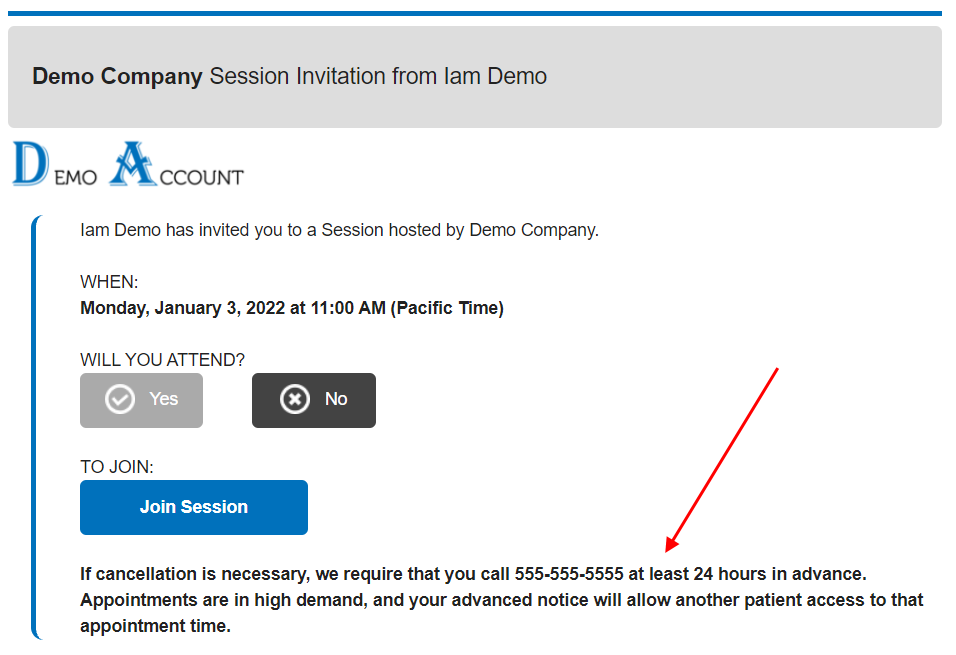
Additional text will be added beneath the Join Session button on Invitation and Reminder emails. This is commonly done if you have removed the RSVP option (for more information, please see Schedule a session: as the host - Enable/Disable Meeting RSVPs .)
This extension does not apply to SMS notifications, and will not add the extension text there.
1. Refer to the section
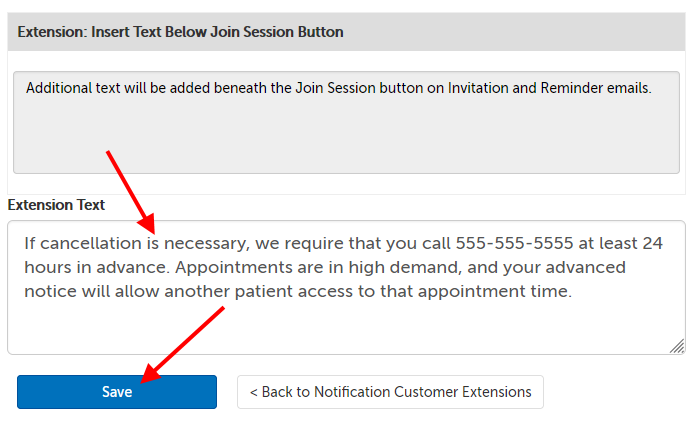
2. For this example, a sample cancellation policy was used. Enter it into the textbox, and then click "Save".
- This field will be plain text, so there will not be any formatting or line breaks.
- The example text is: If cancellation is necessary, we require that you call 555-555-5555 at least 24 hours in advance. Appointments are in high demand, and your advanced notice will allow another patient access to that appointment time.
3. The text entered into this extension appears in boldface below the "Join Session" button in e-mail invites and reminders, like this:
This article was last reviewed by our Support team on October 8, 2021.